


")


This article serves as a tool for goldsmithing practical skills. It ought to be useful for facilitating communication between the teacher and the student.All frequently encountered worksteps and subjects are explained. The work projects are logically ordered after one another; each technique is explained once and then taken for granted in all subsequent work pieces.For each procedure, this article suggests only one work method; different approaches, however, are available in the workshop.
Page table of contents
TANGRAMA
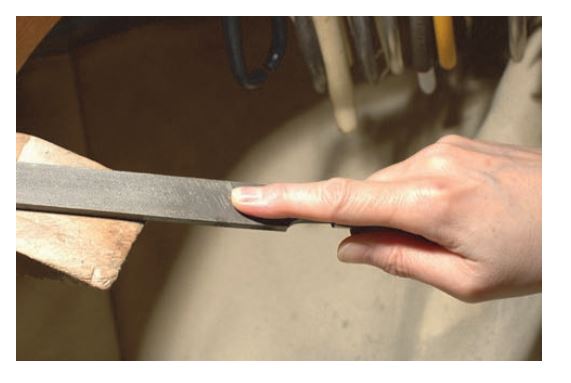
First, one side of the brass sheet is filed to a straight edge using the hand file with the roughest grain. The proper way to hold a hand file is to place your right hand on the wooden handle (which shouldn’t be longer than 80mm) and place your right index finger on the file itself for stability.
The bench pin (W11), which is secured in the workbench with the slanted side facing upwards, is held at a right angle to the brass sheet by the left hand. Left-handers utilize their opposing hands in the same places.
Goldsmithing : Marking, Sawing, Drilling, and Cutting
First in goldsmithing , a compelling design needs to be considered and sketched out on paper. Sharp angles and straight lines should be the only features on this surface. Lines of intercept should halt prior to the points of intercept.Drill a 1.5 mm hole at these crossing places, and then use a ball-shaped bur to cut it out. Three millimeters should separate the lines from the square’s sides.Instructions: Carefully put the design onto the metal plate after finishing the square. It is best to softly mark the lines.Next, use the center-punch to softly highlight the crossing locations.With the left hand, hold the center punch at an angle on the cross points.
halt prior to the points of intercept.Drill a 1.5 mm hole at these crossing places, and then use a ball-shaped bur to cut it out. Three millimeters should separate the lines from the square’s sides.Instructions: Carefully put the design onto the metal plate after finishing the square. It is best to softly mark the lines.
Next, use the center-punch to softly highlight the crossing locations.With the left hand, hold the center punch at an angle on the cross points.used to lightly mark off the lines at a distance of 3 mm from the designated location. The lines can be more clearly highlighted once they are completed correctly.There must also be a center-punched mark on each line. This indentation can be used to create a hole for the saw blade to pass through using a 0.5mm drill (W5). Where the hole on the line is most aesthetically pleasant should be considered.

Drilling in goldsmithing is done using a vertical drill press (W52). A flat piece of wood is placed on the machine’s surface underneath the brass work piece, and the 0.5mm drill is tightened into the three-jawed chuck.Drilling must be done exactly into the centerpunched marks so that very little force is needed to bore through. After the alignment, the drill should be lowered into the marks and the machine should be turned on. The When working with thicker material, the drill should be pushed up and down in order to remove the bore chips. To keep the drill bit cool during drilling, it should be constantly greased.
A ball-shaped bur (W12) is used to further widen the drilled holes at the line intersections after they have been bored with a 1.5mm drill.options for line drilling Nineteen First, the handpiece of the hanging flexible shaft (W15) is tightened with the ball-shaped bur. After that, the brass sheet is positioned on the bench pin’s slanted side, and the bur is precisely positioned in the center of the first hole to have increased openings.Using the flexible shaft’s foot pedal, carefully drill the hole while maintaining the bur’s correct angle to the sheet. It is necessary to cut all enlarged holes to the same depth.

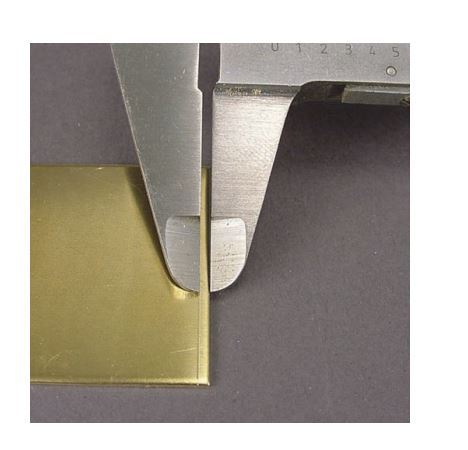
After that, the marked lines are sawed, ideally starting with the shortest line. To allow the saw blade to pass through the opening and be re-tightened in the saw, the jeweler’s saw is opened at the top using a wing nut bolt. Sawing should precisely follow the drawn lines. Additionally, it’s critical to confirm that the sawing stops exactly where it is indicated.On the surface of the brass plate, a 1 mm distance is established from the edges and drawn along all 4 sides using a vernier caliper. On each side, a 45° facet needs to be filed from the edge to this line.
Next, the large flat file No. 5 filing level is placed over the edge of the plate and held at a 45° angle against the bench pin. If the angles of the bevelling are the same or not, it can be determined from the corners where the bevelled sides meet. Sanding is the final step in goldsmithing on both sides.
If you are looking for special and beautiful jewelry according to your taste and design. Leopard jewelry workshop designs and produces the most beautiful jewelry with the best quality for you.